How to set up an automatic drinker system for your chickens
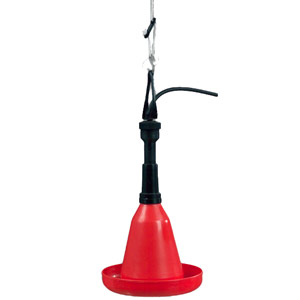
For the automatic chicken drinker system we use in our own chicken pens we use the BEC 75 hanging auto chicken drinker which is large enough for 20-30 hens. There are also 2 larger versions of the automatic chicken drinker available if you have a larger flock.

Other parts you’ll need are:
A low pressure water supply. Either a header tank fed from a mains source or a water butt that you can fill with rainwater or via a hose.
20 mm or 3/4″ pipe. this acts as the distribution pipe carrying the water from the water supply around all the automatic drinkers. We find that plastic is easiest. There are several types, if you need a long run then the blue polypipe is cheaper, if it is a short distance then pipe work for internal use works out cheaper.
Tank connector to suit your water tank and pipework
An Isolation Valve.
A stop end – to seal the end of the pipe.
Pipe Clips / cable ties to secure the pipe.
The only tools you’ll need are a drill fitted with a 6mm drill bit. as everything else is just tighten by hand.
Start by fitting the tank connector into your water tank, next a sort piece of pipe and the isolation valve. You could leave out the isolation valve but it will make life easier if you find any leaks of need to modify the pipework at a later date.
From the isolation valve connect the rest of the pipe that will distribute the water to the individual drinkers.
At the end of the pipe fit the stop end.
Now you can assembly the auto drinkers as per the instructions supplied with each drinker.
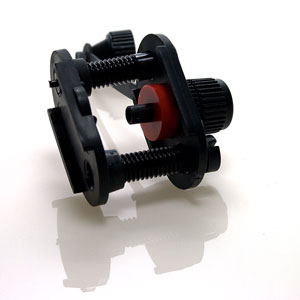
To connect the drinker to the main feed pipe simply drill a 6mm hole into the pipe then insert the spigot of the saddle connector into the hole and then tighten the clamp screws to clamp the red seal against the pipe.
You can now connect the flexible pipe attached to the drinker, fill the water tank, check for leaks and then finally adjust the water level in the drinker.